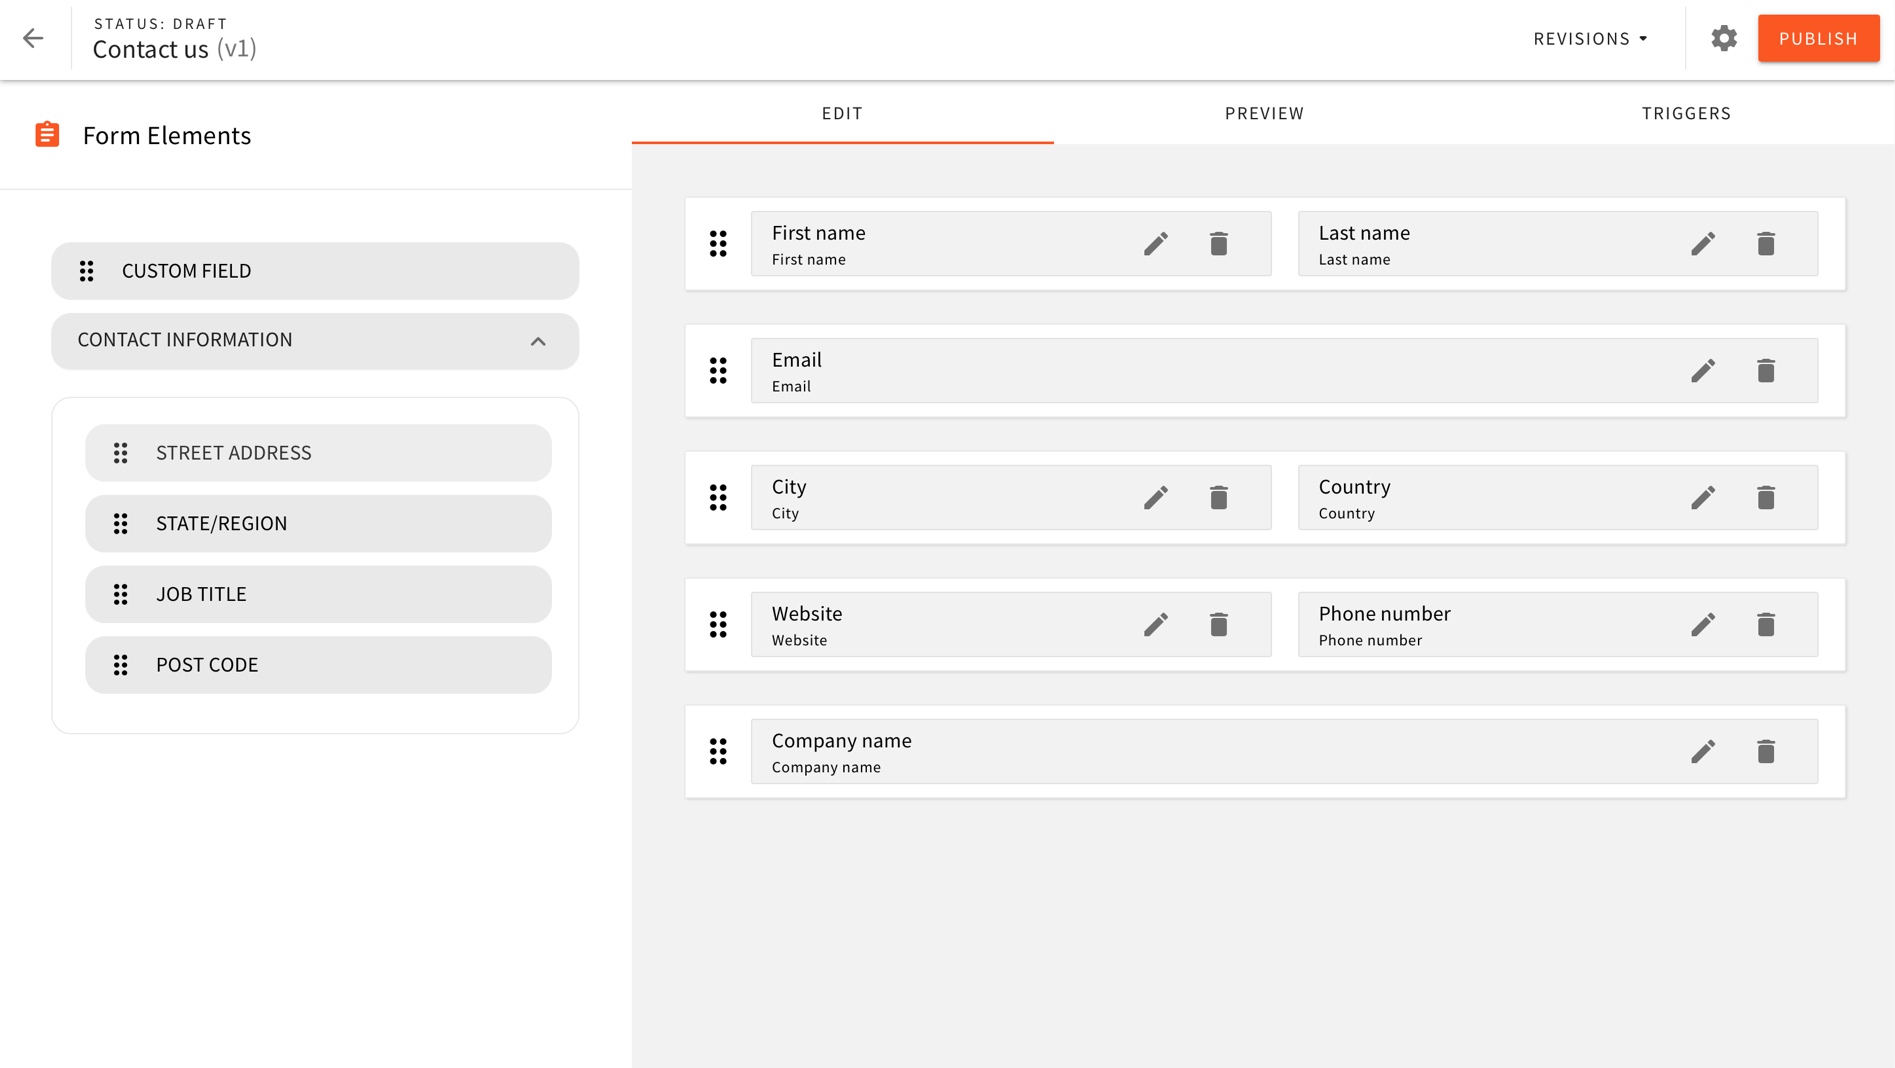
Drag & drop form builder
Drag and drop fields to create a form. It's super easy to use, no code required. Create anything from simple contact forms to complex sales forms, all in a few minutes.
Serverless & Self-hosted
Quick and easy deployment using Webiny CLI.
Complete package
Build forms, define terms and conditions, setup a captcha and view submissions.
Theme
Have a full control over how your form will look like, including on mobile devices.

use a single command to deploy and configure serverless infrastructure
forget about maintenance and scalability headaches
don't overpay your cloud provider, pay exactly what you've used
Why go serverless?
Build both simple and complex forms pages
Create custom fields and validators
Forms have revisions, so you never lose track of changes
Integrated ReCAPTCHA
Ability to add 3rd party services via webhooks
View, filter and export submissions

Drag and drop fields to create a form. It's super easy to use, no code required. Create anything from simple contact forms to complex sales forms, all in a few minutes.
There are endless applications for the forms. Some of them might require quite specific rules for what users can write into a field.
The UI supports different validation rules to be set. From simple rules to creating a combinations with several rules. This control ensures the form only accepts the correct value sets.
Creating multi-language content is quite challenging. Creating a form with multi-language support is even harder. Webiny Form Builder has numerous features for this use-case.
From multi-language field names, placeholders, error messages and validation rules, to multi-language terms of service and captcha messages.
Webiny Form Builder features all the essential form elements you might need. This includes basic input fields, as well as text areas for longer text input. Fields like dropdowns, checkboxes, radio buttons, and hidden inputs are also included.
Preview the form right within the form builder. The preview screen is fully 1:1 representation of how your form will look like once included in a page. The preview also follows the selected theme and all the visual rules that you might have defined.
The integrated option to add a ReCAPTCHA box protects the forms from those evil bots. There is also the option to configure a terms of service checkbox. The ToS is something a user must agree to before submitting the form. This ensuring your GDPR articles are obeyed.
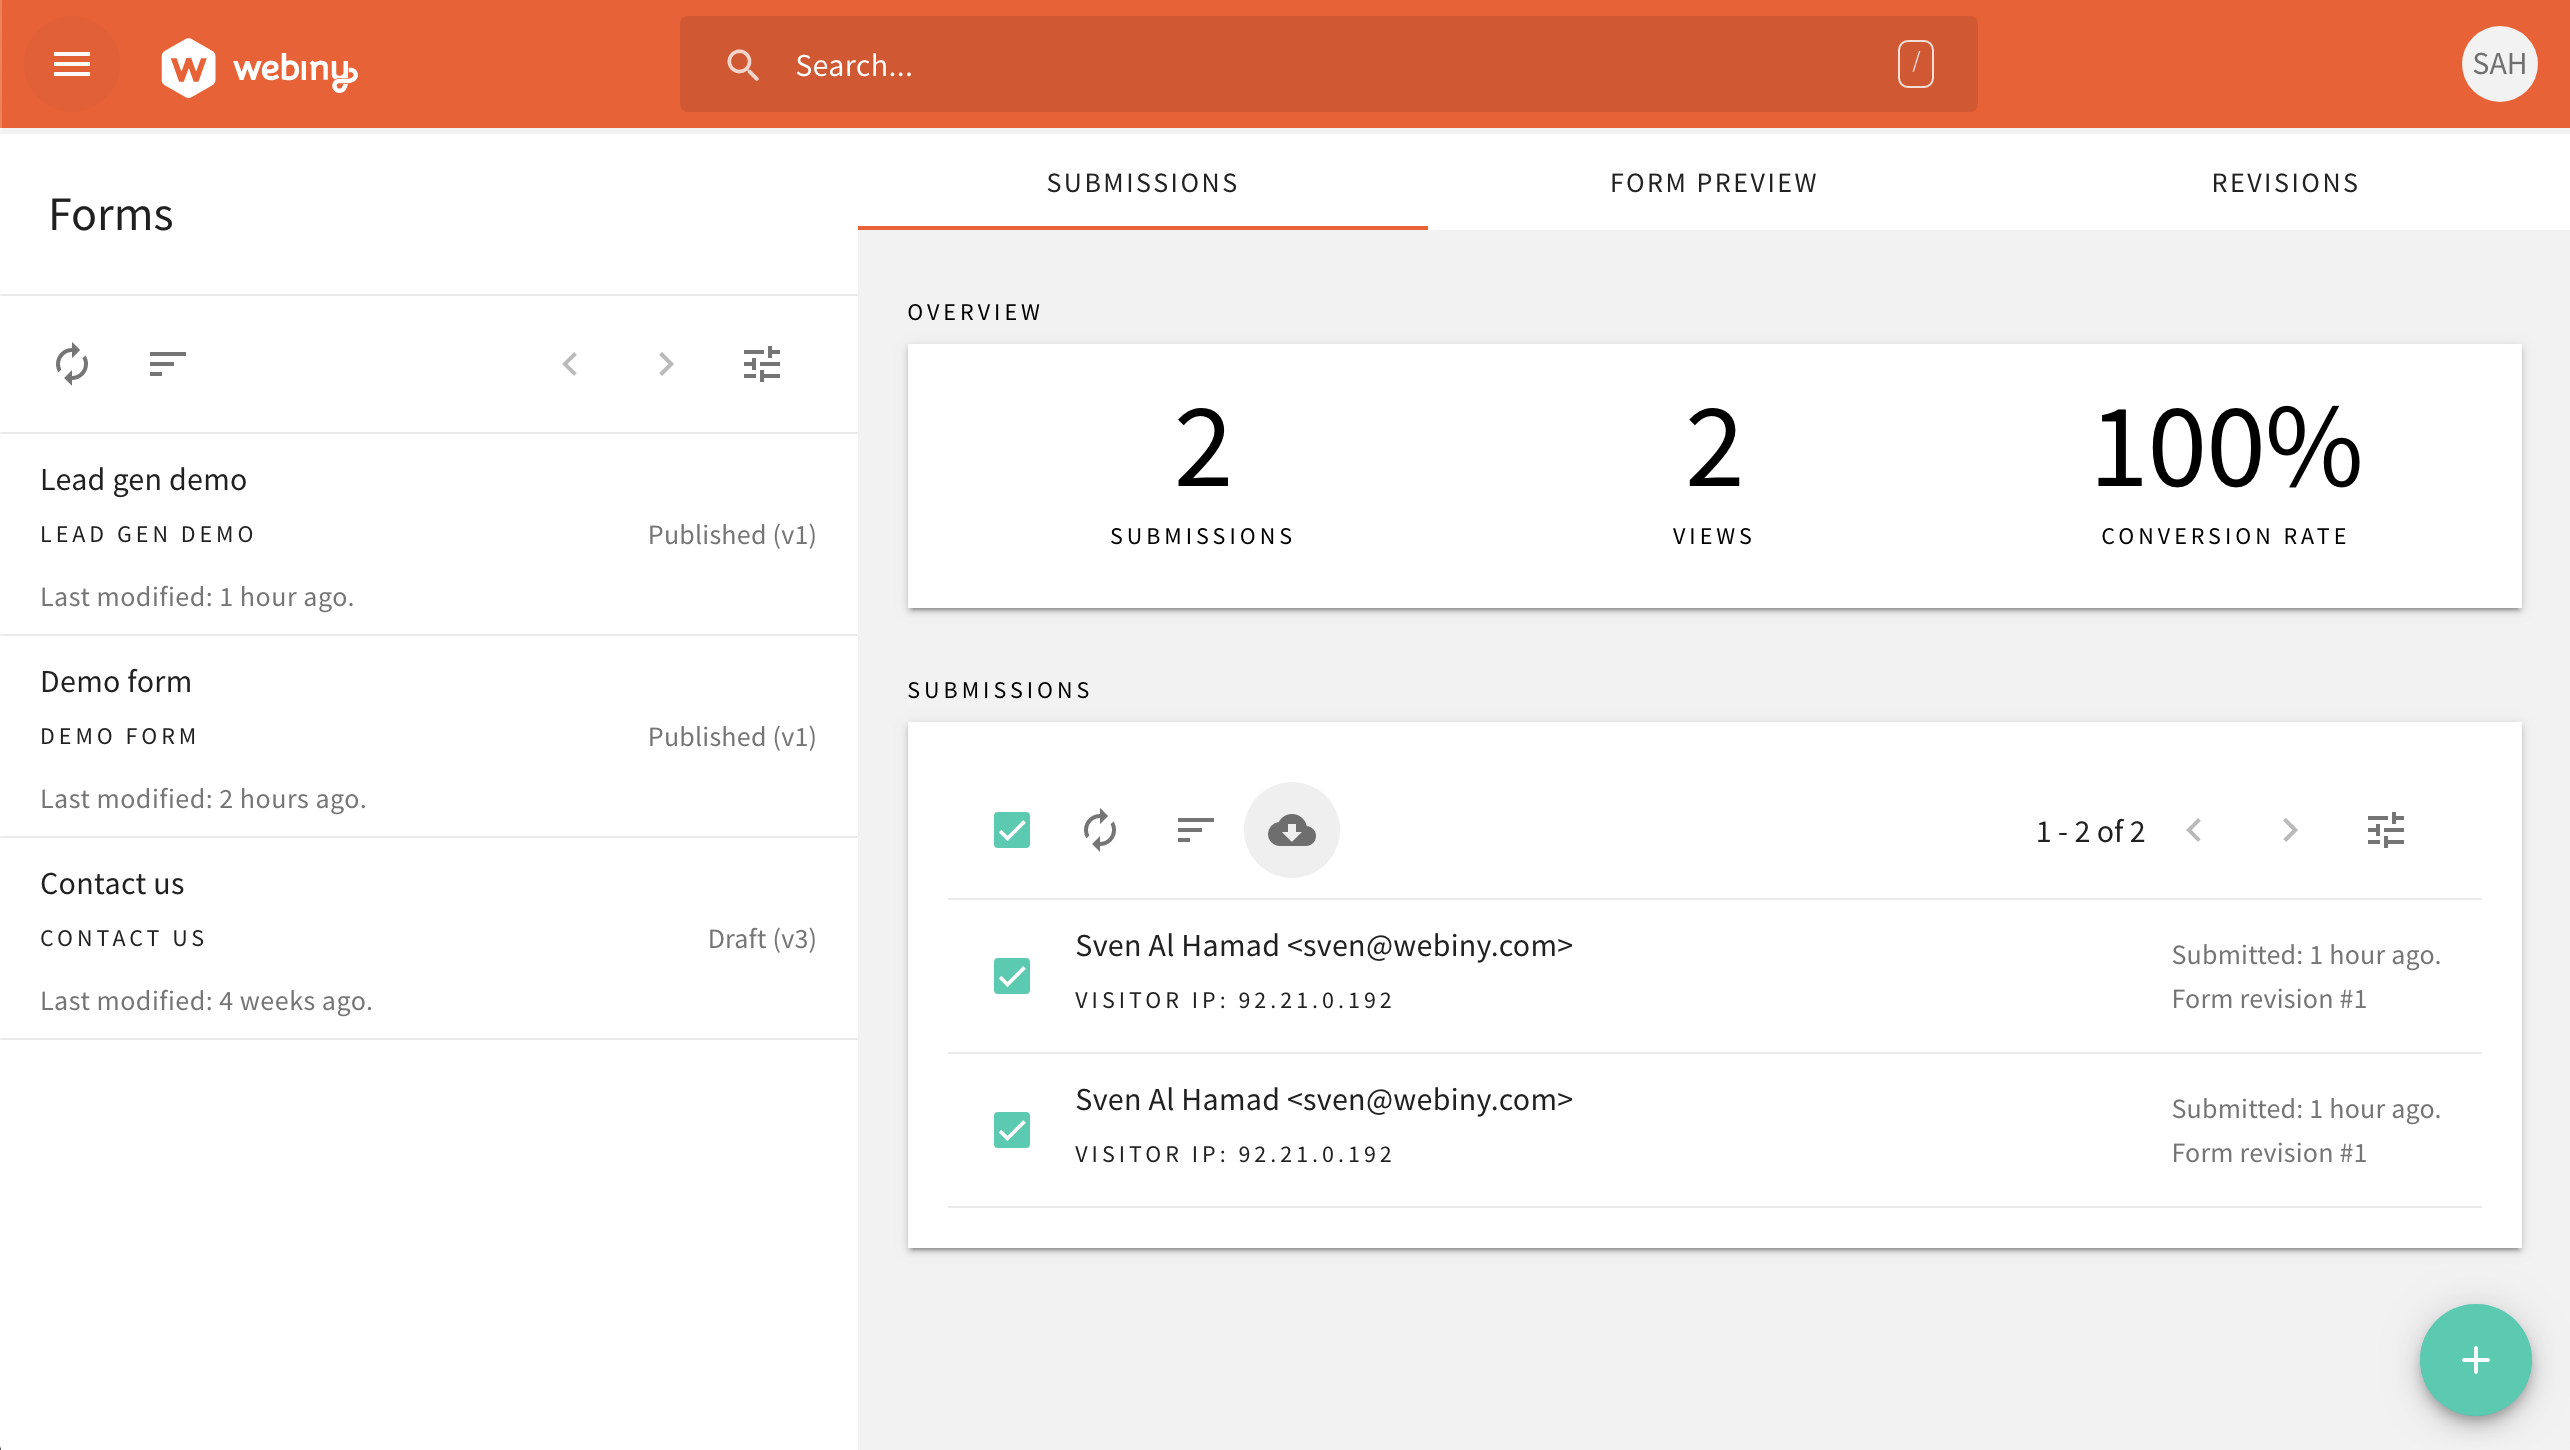
For each form, you will have a clear overview on how the form is performing. You can view the details about each form submit. This provides the full information that the user has entered into the form.
There are cases where you want to trigger specific actions each time someone submits a form. In some examples you might even want to notify and send the data to a 3rd party. Examples are zapier, slack and similar. Webiny Form Builder allows this integration via a webhook. All you need is the POST URL of the 3rd party.
Once happy with how the form looks like, it's time to insert it into a page. The provided integration with Webiny Page Builder makes this super easy. It's a simple matter of dragging and dropping the form element into a column on a page. Once inserted you will select which form and which revision should to display.
Get started with our step-by-step tutorial.
It's only gonna take a minute.
Join our community of developers and fellow Webiny users. Share your experiences and ask questions.